
NOTE: The Hippie bell bottom pants and peasant top are more challenging to sew. You must have accurate cutting and stitching in order to complete these patterns.
Hippie accessory tutorials can be found HERE
")
Pattern also includes a short sleeve variation for the top (see photo below).
You can use the scrub pants pattern to make easy straight leg hippie pants (see photo below).

Bell Bottom Pants
I know the construction of these pants does not follow “proper” sewing rules. They are simplified for children to sew and enjoy on their dolls.
")
1/3 yard fabric
11 inches of 1/4 wide elastic
Sewing supplies
Step 1 – Print the Pattern
Print the PDF Bell Bottom Pants pattern found HERE.
Cut out the paper pattern piece.
Step 2 - Cut the FabricFold your fabric in half and pin the pattern piece on. If you are using stripe fabric make sure they stripes are straight.
Cut out. Do this twice so you have 4 pants pieces. Two will be in reverse.

Step 3 – Sew the Hem
Fold the bottom of the pants 1/2 inch matching up the notch and pin.
Sew along the edge using your presser foot as a guide.
Repeat for all 4 pant leg pieces.

Step 4 – Sew the Side Seam
Place 2 pants pieces together with “pretty” sides touching.
Make side edge even and pin.
Sew using a 3/8 inch seam.
Repeat for other two pant legs.

Trim a little triangle off the edge so it doesn’t stick out past your hem.

Step 5 – Sew the Center Seam
Pin both pants sections together with “pretty” sides touching.
Make the upper curved edges even and pin.
Sew using a 3/8 inch seam.

Step 6 – Sew the Inner Leg Seam
Refold the pants bringing the center seams together. You will see it form the legs.

Make the edges even and pin.
Sew using a 3/8 inch seam.

Again trim a little triangle off the edge so it doesn’t stick out at the hem.

Step 7 - Sew the Casing
Fold the top of the pants down 5/8 inch and pin.

Mark and opening for the elastic to go in.

Slide the pants on to the free arm of your sewing machine and sew along the edge using your presser foot as a guide. Do not sew between the marks. Remember the elastic has to fit through the casing so keep your stitching straight.


Step 8 – Insert the Elastic
Use a safety pin to help insert the elastic into the casing.

Sew the ends of the elastic together.

Pin and sew the opening shut.
Turn the pants right side out and press the seams neatly so the bell bottoms stay out.

Enjoy Your Bell Bottom Pants!
Long Sleeve Peasant Top (short sleeve variation included)
")
Supply ListPDF Peasant Top pattern (includes long and short sleeve) HERE
1/4 yard fabric
Two 4 inch long pieces of 1/4 wide elastic
One 11 inch long pieces of 1/4 wide elastic
Pressing cushion (optional)
Sewing supplies
Step 1 – Print the Pattern
Print the PDF Peasant Top pattern (includes long and short sleeve) found HERE
Cut out the paper pattern pieces.
Step 2 - Cut the FabricFold your fabric in half and pin the sleeve pattern piece on.
Cut out.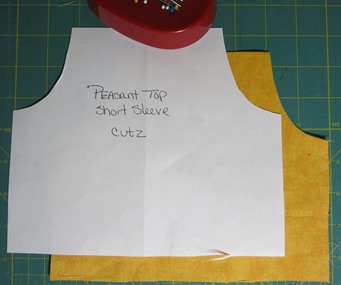

Fold your fabric in half and pin the front/back pattern piece on the fold.
Cut out.

Step 3 – Sew the Side Seams
Place the front and back pieces together with “pretty” sides touching.
Make the side edges even and pin.
Sew using a 3/8 inch seam. Do not sew the curve.

Press the seams open using a pressing cushion. You can purchase these in stores or make one of your own using this tutorial.

Step 4 – Sew the Hem
Fold the bottom edge 1/2 inch and pin.
Slide on to the free arm of your machine and use your presser foot as a guide to sew along the edge.

Set this aside.

Step 5 – Make the Sleeve Casing
Fold the end of the sleeve 1/2 inch and pin.
Sew along this edge using your presser foot as a guide. The elastic has to fit inside this casing so keep your stitching straight.

Use a safety pin to help insert the elastic.

Pull part way through then sew the end of the elastic to the casing to hold it in place.

Continue pulling through then sew the elastic to the other end of the casing.

Step 6 – Make the Sleeves
Fold the sleeve in half with “pretty” sides touching.
Make the edge even and pin.
Sew using a 3/8 inch seam (do not sew the curve).
Repeat for other sleeve.

Step 7 – Attach the Sleeve
Turn the sleeve “pretty” side out and slide it into the shirt. Both pieces should be “pretty” sides touching.
Match your center seams and pin. Make the remaining curved edge even and pin. 

Sew using a 3/8 inch seam.
Repeat for the other sleeve.

Pull the sleeves out and it should look like this.

Step 8 - Make the Neck Casing
Fold the top of the shirt 1/2 inch and pin. Keep the sleeve seams point out toward the sleeves.
Mark an opening for the elastic.

Slide on to the free arm of your machine and use your presser foot as a guide to sew along the edge. Do not sew between your marks. The elastic has to fit inside the casing to keep your stitching straight.

Step 9- Insert Elastic
Use a safety pin to the help insert the elastic. 

Sew the ends of the elastic together.
Pin and sew the opening shut.
Enjoy Your Long Sleeve Peasant Top!
©2008 Carol Steely
Funthreads.blogspot.com
Linked with these linky parties:
5 comments:
Thank you for the pattern. I'm not really a sewer, but I have sewn a few skirts for my daughters AG dolls. I appreciate how easy your tutorial and patterns are to follow...even for the beginner sewer!
Thanks for taking the time to do this tutitorial...can't wait to make this outfit for my DD Julie doll!
Thank you so much for the pattern - I am just making it up but the front/back pieces are different in your photos to the pattern pieces? Are the sleeves/back and front pieces mixed up by any chance? Does this make sense. The photo shows a piece with straight sides and the pattern has an angle for the back and front? Just wondering before I make a big mistake! as I don't have a doll to test it on! Gift for my nieces.
Photos have been fixed. Thanks for catching that.
I made this outfit for my three year old granddaughter's doll. Now my eight year old granddaughter is getting her own sewing machine so she can make doll clothes and more! Thanks for sharing. Claudia
Thank you so much for the patterns. I am making kits for my granddaughter to sew for herself and for her 18" doll. She loves what I have been putting together for her to make and she is doing a great job. She will love this too! Thank you again.
Post a Comment