Showing posts with label Applique tutorials. Show all posts

Friday, August 28, 2015

Fun Friday Tip

Do the words “fusible applique” scare you? They don’t have to.

I just spotted this free Machine Applique E-Guide from Landauer. It has all the tips and tricks you need to know collected in one place ~ Woot! It’s a must print for your sewing room reference notebook.

Lots of great photos detailing how to work with fusible web, stitch curves and corners, and how to use those decorative machine stitches to add detail. LOVE it!!

Everything you need to know! Go grab your copy!

EMAILCOVER600AppliqueBasics_quiltbooksandbeyond 

Happy Friday!!!

Friday, August 21, 2015

Applique Overlay

funtip full size

Back in May I shared a quick tutorial on using your applique placement guide under your pressing sheet to pre-fuse your shapes into one unit. BUT….. What if you’re working with a dark fabric that you can’t see through or pieces that aren’t actually connected?? Well… here’s another way to use your applique placement guide.


Pick up a cheap piece of vinyl from Wal-Mart. I used a dry erase marker so I could wipe off my sheet and reuse it. You could also use a permanent marker if you don’t mind throwing your sheet out after each project.

Slide the placement guide under the vinyl and trace off as much detail as you need to aid in the placement of the pieces. I only marked the general shape outline and a few specific points.

P8060557

I placed my block on a pressing board, centered the design over it, and pinned the top edge to the board through all the layers. This way the vinyl sheet can be lifted and lowered as needed and gives you easy access to press as you go.

P8060559

P8060572
Tada! Tedious placement is fast and easy.

P8110573


Now go have some fusible FUN!


If you want to learn this trick and a whole lot more check out some classes on Craftsy.

I just finished Fun With Fusible Applique by Debby Luttrell. She walks you through everything you need to know about making fusible applique. Even I learned three fun new tricks from her class and I’ve been doing this a long time.

affiliate link for easy access

Friday, August 14, 2015

Printing on HeatNBond Fusible

funtip full sizeJust when I thought fusible applique was fast and fun….it got even FASTER!!

Did you know that you could put HeatNBond Light through an inkjet printer? They even sell convenient pre-cut sheets to help you. Ooohlala!!

P8110574

No more tedious tracing. In no time flat I had perfect pieces printed and labeled.

P8060562Bam! Separated and sorted.

P8060564

Swoosh!! Ironed and ready to cut.

P8060566

Zippity Doo Dah!!! Ready to add to my block.

Fast, perfect, and best of all NO TRACING involved. Woot!

P8060570

You know me… I always have to “play”. I tried cutting my own sheets from a bolt of HeatNBond. It worked but it was a little trickier because the sheets don’t always stay flat in the printer bed after being wrapped around the bolt. Be careful as you don’t want them to jam in the printer.

Grab some and give it a try!

affiliate link
HeatnBond Lite

Tuesday, July 28, 2015

Fusible Applique Tutorial UPDATED

I love fusible raw edge applique. It's fast and easy to do. Don't get me wrong, I've done hand applique and I greatly admire those that take the time to hand applique. My quilts are not made to be show quilts. I make my quilts to be used, loved and worn out. The following is the way I do my appliqués.

Suggested Supplies

You can find the paper backed fusibles and appliqué pressing sheet at Fabric.com

affiliate link
Orders of $35 & up Ships Free.

  • Iron and Ironing Board
  • Iron Off Hot Iron Cleaner This is my favorite hot iron cleaner that I use frequently while doing applique projects. (see photo below). You will need to clean your iron after working with the fusible or it will leave marks on the right side of your fabrics.
  • Applique Pressing Sheet - This will protect your ironing board from gunk. The fuse web will not stick to it. It can also be used to prefuse appliques with lots of little pieces.
  • Paper backed fusible - There are several fusible web products on the market. You want to make sure you purchase a "light" version of whichever fusible you pick. They come in packages and by the yard on bolts.
  • Pre-washed Fabrics - It's recommended that you use pre-washed fabrics. The products will stick better if you do.

    Information About Ironing Appliques

    No matter how careful you work your iron will collect sticky fusible and pencil goo.  (see photo below). You will need to clean your iron after working with the fusible or it will leave marks on the right side of your fabrics. My personal preference is Iron Off Hot Iron Cleaner.

    You only need a small amount on a towel.


    Wipe the hot iron to clean it. After all the goo is removed run your iron over a clean section of the towel to remove any left over cleaner. Amazing what comes off the iron.

    What is a Paper Backed Fusible?

    This is what some of the paper backed fusibles look like. Keep the fusible attached to the paper. Others also have paper on both sides of the fusible.

    HeatNBond LightOLYMPUS DIGITAL CAMERA         Wonder Under LightP2100234

    Let's Create an Applique

    When working with fusible applique you will be tracing the design in reverse without a seam allowance. If your pattern is not reversed you will need  to turn the pattern paper over and trace over the design to reverse it yourself. You may need to use a light source like a window or light box to see the lines.

     Draw your design as an outline drawing. Think of it as a coloring book but instead of crayons you’re going to use fabric to color between the lines. For this example we’ll use hearts. This a a good practice shape because it has straight as well as curved edges.

    Template pattern sheet

    Here is the design taped to a window. Since the heart is a symmetrical design I added the letter “C” so you could see that the image was reversed. Next you will place the paper backed fusible over the design and trace it.

    Rough cut around the appliques to remove them from the sheet. Don’t cut on the lines yet.

    image

    It’s not necessary but if you have several layers to your design you can trim around the inside of the pieces leaving about 3/8”. It helps to keep the designs from getting too stiff but it does increase the difficulty of working with the fusibles. Keep the pieces you remove to trace smaller designs on later. Store them in a Ziploc baggie.


    If your fusible has two layers of paper, slowly peel the backing (side without the design on it) off.


    Again, this is what the fusible looks like. Be careful to keep the fusible web with the design paper.

    image
    Iron all the wrinkles out of the fabric. Then place the appliques onto the wrong side of the fabrics. Follow the manufacturer’s instructions for your product to fuse in place.

    Note: I’m showing one applique with the center cut out and one done solid so you can see what both look like.


    Cut out the applique designs on the lines.

     
    Carefully peel off the remaining paper. This time be sure to keep the fusible web with the fabric.

    image

    Place the appliqués onto the right side of your background fabric. The appliqués can be repositioned until they are pressed with an iron. When you are happy with their position follow the manufacturer’s directions for your product to fuse them in place permanently. As with all quilting, press straight up and down. Do not iron side to side. You don’t want to warp the block or create puckers in the appliqué.

    Stitch around the appliqués (see stitching details below). Even though you are using a fusible web you will need to stitch the edges to keep them from coming loose with washing and handling. After you finish stitching give it a good pressing to set the stitches.
     

    Information About Stitches


    There are a number of ways that you can stitch the edges of your designs depending on your preference and how the quilt will be used.


    (from left to right)
    1. Satin Stitch - This is a zigzag stitch sewn with a length set close to 0. It's a solid looking outline. Great if you want a bold outline.
    2. Zigzag stitch - A small zigzag stitch along the edge.
    3. Straight Stitch - A straight stitch close to the edge. I would only use this on wall hangings or things that would not get washed. If sewn with matching thread it would almost "hide" from the eye.
    4. Blanket Stitch - This stitch has 5 strikes (forward, reverse, forward, side, side). It's visually similar to using a zigzag stitch. It's my personal favorite. I think it has a hand made crafted look to it.

    Important Stitching Technique

    When sewing around the applique do not pull the fabric and try to "steer" around curves. This will cause the fabric to pull in and pucker. Instead stitch until the fabric begins to head into a curve.


    Stop with the needle down and pivot your fabric to bring it straight in front of the needle again. Do this as needed to get around a curve. This may need to be done every 2 or 3 stitches if you are on a small curve. But trust me, the results will be worth the effort.


    Information About Thread
     
    The color thread you choose all depends on your design idea. Matching the thread color and contrasting the thread color give two very different looks (see below).
     
     
    I hope you enjoyed this tutorial and maybe even learned something new.
    See the tutorial about working with applique pressing sheets next.
  • Friday, May 1, 2015

    Your Applique Pressing Sheet

    Welcome to the first Fun Tip Friday!!

    funtip


    This is the sheet I like to use HERE


    An applique pressing sheet is a great friend. It not only protects your ironing board and iron but it can also be used to pre-piece appliques with fiddly little pieces.

    Just slide the design template under the pressing sheet. If the lines are fine and hard to see just trace over them to darken them first.

    P4300247 (2)

    Prep your applique shapes with fusible and place them in the correct position over the drawing. Press following the manufacturers instructions for the product you are using.

    P4300248 (2)

    When the fabric is totally cool carefully lift the applique off the pressing sheet. It’s neatly fused into one large design element that can easily be centered on your block.

    backP4300250 (2)

    frontP4300249 (2)


    Go forth and applique away!

    Friday, April 24, 2015

    Mistyfuse How I Love Thee

    My “normal” fusible has been making me very frustrated lately. Ever since the new product came out it’s been gunking up my needles something terrible. So I had to find something new….enter Mistyfuse. Have you used it? It’s so wonderful I just had to purchase an entire roll.

    P4220295

    What is this magical Mistyfuse?

    If you haven’t played with it yet, it’s a very fine web. Much thinner than other fusibles. It has a great bond and remains really soft after it’s fused to fabrics. No more fussing with cutting out the center of your designs to make them feel softer. No more sticky sewing machine needles and thread breakage.

    It’s very light and shifty to work with at first because it isn’t backed with paper like other fusibles. But you’ll get used to handling it.
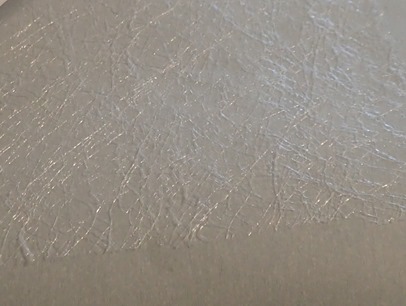
    P4220302

    The same company also makes the Goddess pressing sheet. It’s a non stick sheet made of Teflon and fiberglass.

    P4220320

    But Reynolds parchment paper works really well too. That’s what I use to transfer my design templates.

    P4220300

    What’s the difference you might ask?

    Their Goddess pressing sheet gives the fusible a really nice shine so it’s easy to see. The Reynolds parchment paper leaves a matte finish that’s hard to see on most fabrics.

    P4220297


    There are two ways to transfer your designs

    Leaving the paper on…

    1. Iron Mistyfuse to the back of your fabric.

    2. Trace the reversed template design on to the parchment paper.

    3. Iron the parchment paper to the fused side of the fabric. After it cools cut it out like normal then peel off the paper.

    P4220314

    Don’t like cutting through paper…

    1. Iron Mistyfuse to the back of your fabric.

    2. Trace the design facing the right way, not reversed, onto the parchment paper. Use a light pencil if fusing to a dark fabric or a #2 pencil if fusing to a light fabric.

    3. Place the Mistyfuse side of the fabric against the drawn lines and press. The pencil will transfer to the fusible.

    4. When cool remove the parchment paper and cut out the fabric.

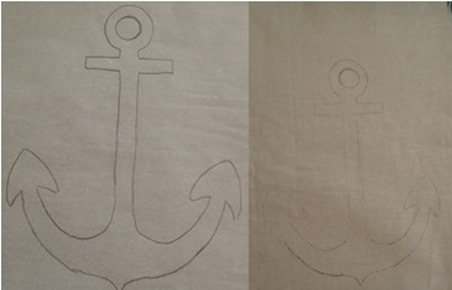
    Light pencil tracing to dark fabric/Mistyfuselight

    #2 pencil tracing to light fabric/Mistyfusedark
    Cleaning your iron

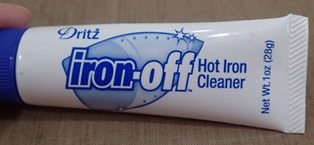
    Have no fear. My “go to” product, Iron Off Hot Iron cleaner, works perfectly with Misty Fuse.P4220306
     

    The only down side I see…I’m left with lots of fabric bits that have fusible on them so they can’t be used for anything other than fusing. Typically I would trim close to my design then fuse it to the fabric. Now I have to fuse the fabric first.

    Anyone know a way around this?

    I’d love to hear your adventures with Mistyfuse!