Fusible Applique Stocking Tutorial
My stocking does not use batting but it is lined.
If you are new to fusible applique you can find a detailed tutorial HERE.
Supplies
Stocking pattern drawn on 11 x 14 paper (one is available for free HERE)
Applique pattern printed out (see below)
1/3 yard of stocking fabric
1/3 yard of lining fabric
1/4 yard of cuff fabric
Scraps of white (face & snowflake), orange (nose), green (scarf)
Scrap of ribbon for hang tag
2 large buttons
1 sheet of Steam-A-Seam 2 lite
Applique Pattern
Save and print this pattern sheet. There is a 1-inch scale marked on it for correct sizing.
Directions
Cut two stocking pieces and two lining pieces using your pattern and set aside.
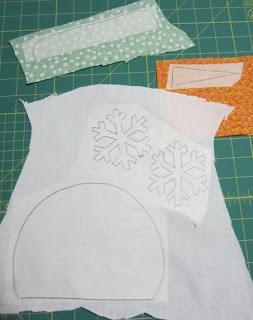
Trace applique pieces on to the Steam-A-Seam. The pattern is already reversed and ready to trace.
Rough cut around the pieces to separate them.
Peel off the paper backing and fuse the pieces to the back of your selected fabrics.
Cut out the pieces and place them on the stocking fabric. Leave approx. 4 1/2 inches above the snowflakes for the stocking cuff.
Fuse the pieces in place according to package directions.
Trim the bottom of the snowman if he hangs past your stocking edge.
Stitch around the pieces using the method of your choice and add the button eyes. I used a shortened straight stitch.
If you have any questions just ask.
Enjoy!


No comments:
Post a Comment