18-inch Doll Sleeping Bag Tutorial
Supply List
3/4 yard of outside fabric
3/4 yard of inside fabric (the lining)
3/4 yard of medium to high loft batting
1 yard of grosgrain ribbon
Freezer paper, wrapping paper or newspaper to draw your pattern on
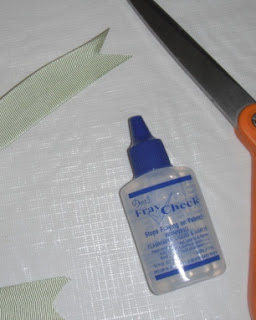
Fray check (optional)
Sewing Supplies
Seam Allowance = 1/2 inch
Step 1 - Make The Pattern
Draw a 21 x 27 inch rectangle on a piece of paper and cut it out
Label the pattern “sleeping bag – cut 1 of batting & cut 2 of fabric ”
Step 2 – Cut It Out
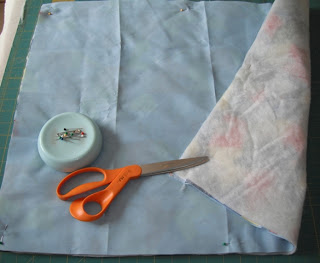
Place the batting on the table.
Place the sleeping bag fabric on top of the batting with “pretty” side up.
Now place the lining fabric on top of the pile with the “wrong” side facing up.
Pin the pattern on to the pile and cut it out.
Remove the pattern but slide the pins back into your fabrics to keep them together for sewing.
Step 3 - Sew the Top of the Sleeping Bag
Optional: Use a walking foot for this project if your machine has one.
Use a fabric marker to mark a dot on the center of each short side.
Step 4 - Clip the Corners and Turn
Carefully make a small clip at your side dots. Do not cut past your stitching.
Carefully clip the sewn corners. Do Not cut your stitching.
Turn the bag “pretty” side out and use your point turner to make neat corners.
The snips at the dots will turn out and make a nice edge to start your seam with.
Step 5 - Attach the Ribbon
The sewn edge is now the top of your sleeping bag.
At the bottom of the bag (unsewn edge) mark a dot 6 ½ inches in from the side on the outside fabric
Now fold the ribbon in half and place the folded edge of the ribbon at the dot and pin. Be sure your ribbon is facing into the bag like the photo.
Stitch across the folded edge of the ribbon to hold it in place.
Step 6 - Sew the Bottom of the Sleeping Bag
Fold sleeping bag in half with “pretty” sides touching.
Make all the layers(outside fabric, lining fabric and batting) of the unsewn edge even and pin.
Start at the dot and sew down the side and across the bottom of the bag.
Set your machine on a zigzag stitch and finish this edge to keep the batting from pulling out.
Turn bag pretty side out and use your point turner to make neat corners.
Step 7 – Optional
Fold the end of the ribbon in half and cut off a little triangle. This will make a pretty edge on your ribbon.
Finish the edge with a drop of fray check.
© 2006 Carol Steely All rights reserved


7 comments:
Thank you for this great tutorial. I made one for my daughter using fleece and lining the inside with a cotton-type fabric (no batting since the fleece is kind of thick already). There were some tricky parts I read that I couldn't quite figure out until I actually started sewing the bag and then it made sense and the sleeping bag turned out really cute. :)
Thank you for this wonderful tutorial. Except for making a mistake with directional fabric it came out perfectly. My daughter was thrilled and her friends will be to come Christmas.
Thanks for this tutorial. I made it to your blog here via femina girls. I have now made 3 of these - 2 for Christmas gifts and one for my daughter's birthday. Thank you!!
Seriously awesome tutorial. Just made one for my daughters birthday and can't wait for her to see it. Thanks for sharing :)
I just made this and it is SOOO cute! Thanks for the very helpful tutorial.
Thank you very much for sharing! I just finished making this for my great niece Brooklyn. Now, I just have to wait until Christmas to give it to her. Adorable, and easy to follow your directions!
Thank you for the easy to follow tutorial. I used fleece for both the inside and outside, plus batting. The sleeping bag looks great! Pretty and Poofy are the words my daughter used to describe it. I'll be making 4 more for gifts.
Post a Comment