I was recently asked why I didn’t design my patterns to be used with a Scan N Cut machine. The answer is any pattern that has exploded pattern pieces can be used in a Scan N Cut machine with a little tweaking. So here is a tutorial using the snowman sheet from the recent Snow quilt along.
The tutorial will seem really long but once you learn the process you will find it really only only takes a few minutes to do.
GETTING READY
Special Note: I’ve applied my fabric tack sheet to a standard mat and leave it there permanently. It’s labeled with an “F” at the bottom for fabric. This way if I accidentally cut through the sheet a bit I never have to worry about it until it’s no longer tacky and ready to toss in the trash. What a money saver! Also, don’t throw out the blue cover sheet is was attached to. It comes in handy as a non stick cover while pressing things on to the mat.

So, first step is to prep your fabric. Cut the pieces you need, apply the adhesive, and mount on your fabric tack sheet. Set this aside. I was able to get three pieces of fabric on the mat at once.
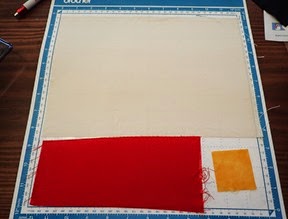 I’m using tan instead of white so you can see it in the photos.
SCAN IMAGE
Special Notes: You need to know how much tacky is left on your mats. I like to use the “low tack” mat for computer paper.
Mount the pattern template sheet to the “low tack” mat and set it aside.
Turn on your machine. Click SCAN>SCAN TO CUT DATA.

Load the template mat and click START. My sheet also has the direction text on it. Don’t worry about that.

It will take a few moments to process the image. When the image comes up click the OUTLINE button. Use the handles to drag in the background closer. This saves memory space. Again, don’t worry about the direction text at this time.
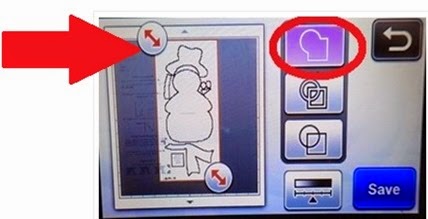
When you are finished adjusting click SAVE>MACHINE MEMORY>OK to use the default name. The original scan is now saved to the machine’s memory.

Click LOAD/UNLOAD mat button to release the mat. NEVER pull the mat out.
LOAD IMAGE TO WORKTABLE
Now you need to get the image from the memory and place it on the worktable.
Click the HOME BUTTON>OK to delete images>PATTERN>SAVED DATA> MACHINE MEMORY> Find and select the image> OK.

Click LAYOUT EDITING BUTTON to bring up the image on the editing worktable.
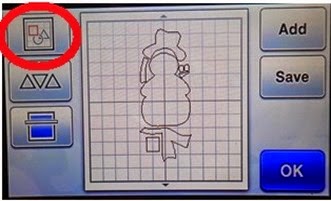
Note: As you can see it didn’t recognize and save the text. It did save the box around the text and one other little item that isn’t needed but it will be deleted in the step.
DELETE UNWANTED PARTS
Next you need to delete all the unwanted pieces. You’ll also delete the hat for now since the black fabric didn’t fit the mat.
Select the pieces by tapping on them or use the arrow keys to scroll one at a time. When you have a piece you don’t need click TRASH CAN>OK to delete it>OK again to return to the worktable.

SCAN FABRICS
Three snowmen were needed for this project. Let’s go ahead and set everything up so it will cut all the pieces on multiple fabrics at once.
Click the SCAN BACKGROUND BUTTON . Load and scan the fabric mat.
Click the SETTING BUTTON .
.
Find and lighten the background. Click OK.

MULTIPLY PATTERN PIECES
Click LAYOUT EDITING BUTTON .
.
Select and drag the snowman and eyes up to the right corner. Drag the nose to the lower right corner. Drag the remaining two pieces to the lower left corner. After arranging pieces click MULTI PATTERN SELECTION BUTTON.

Click AREA SELECTION BUTTON>drag the frame around the body and eyes>OK. This will put you back on the image editing worktable with the body and eyes selected.

With the body and eyes selected click UNIFY BUTTON>OK. They are now grouped as one piece.

Click IMAGE EDIT BUTTON .
.
Select each piece one at a time and set the count to 3. When done click OK.

This will bring you back to the editing worktable and you will see all the added pieces.

Click IMAGE EDIT BUTTON .
.
This time you will select and drag the pieces in to position over the correct fabrics. You can use the ROTATE BUTTON to adjust as needed.When finished click OK.
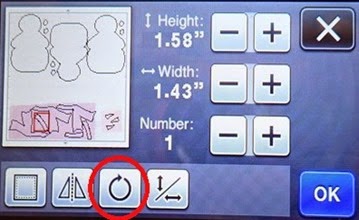
You can use the ZOOM BUTTON  to check that everything is placed correctly over the scanned fabrics. If it looks good click OK to go back to the worktable. Click SAVE just in case you may need to use it again.
CUT
Click OK again and you will be in the Draw/Cut screen.
Check the chart in your user manual for blade and pressure setting for your material.
Adjust and load your cutter. Click SETTING BUTTON  and adjust the cutting pressure. Click OK.
Note: Check the chart in the user manual if you are unsure of your settings. You can also add and run a little test sample first.

Click CUT  and START.
When finished click the LOAD/UNLOAD MAT BUTTON  . NEVER pull the mat out.
Carefully remove the cut pieces.
CUT REMAINING HAT PIECES
Now you still have to cut the hat. Load the black fabric on to the mat.
Click the HOME BUTTON>OK to delete images>PATTERN>SAVED DATA> MACHINE MEMORY> Find and select the image> OK.
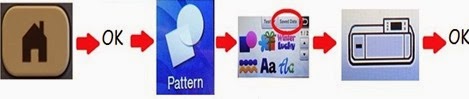
Click the layout button to bring up the image on the worktable. Click the MULTI PATTERN SELECTION BUTTON .
.
Click the MULTI GROUP BUTTON>tap the hat to unselect it>OK.
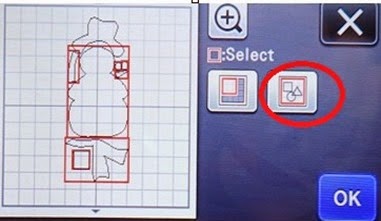
Now you will be on the editing worktable with all the pieces highlighted except the hat. Click TRASH CAN>OK to delete them. You will left with just one hat on the worktable.
From this point you will work through the same process to cut three hats as you did previously with the snowmen….. Click the SCAN BACKGROUND BUTTON. Load and scan the black fabric mat. You can lighten the background if needed. Multiply and put the hats in place over the fabric and cut.
TADA!!!!
Did you learn something new or interesting?


